nicherbert
Member

Hello everyone!
This is my first time posting, though I have been to this site a few times hunting for some random problem like we all do. I have run into an issue myself. I am starting out now using Cimplicity 2022 and attempting to leverage Classes/Objects along with the Graphic Templates that go along with it. I apologize for the lengthy thread, but the details are what is keeping me from being successful.
The issue I am running into is a scenario that I'm fighting to overcome. We have defined several Classes, some of which leverage embedded (Composite Members) classes within another. Several things I ran into that have been difficult to overcome, and now I'm looking for a good workaround, but each step of the way, I am finding what I think are bugs in Cimplicity, or I don't quite understand how to leverage the tool. I have read the documentation, but as normal, the help files and examples don't go quite far enough to do what should be possible.
First issue I ran into was related to the CIMPLICITY reserved variables. We are using an OPC-UA server and attempting to build the address by assigning parameters to do so. Part of doing this is to leverage the Object instance to make this work. There are 3 variables we are looking at: $ADDRESS, $OBJECT, and $ID. I will be using the following information in my examples to best explain what I am seeing:
As you can see, $OBJECT and $ID have duplicate items, so if using {$OBJECT}.{$ID} to build an address, we have an issue when using composite members. To solve this issue, we can take advantage of the $ADDRESS variable and in the parameter definition of the object, we can assign the {$OBJECT} or {..\$OBJECT} to the $ADDRESS variable and instead of using {$OBJECT}.{$ID} to build the OPC address, we can simply use {$ADDRESS}.[Composite Member Data Item Name]. Ok, so for the point itself, this works great and the point has the correct OPC path. Now, onto the graphics.
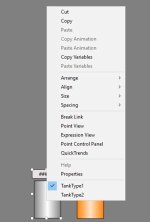
On the graphics front, we also build up Class templates to use. In our example, we could leverage the VALVE independently, and when done, we have no issue with the display. Keep in mind, building graphic templates requires you define $OBJECT and set it public. This is so we get the Object Instance name as the $OBJECT variable to use in our design. Again, as a standalone instance, this works great. Now, when we go to embedded one graphic template into another (we are using a linked copy) as in the TANK1 case, the TANK1 items work great, but the composite members do not. One would think the $OBJECT variable would take on the parent $OBJECT and be passed down, or built up to also include the compositive member name as it does in the above example, but here, we find that not to be the case. Instead, $OBJECT is just blank (or not defined, not sure which). You can note this by looking at Expressions and Point Control Panel to see the path is not fully formed. Ok, so simple enough, I can set the $OBJECT parameter by passing {..\$OBJECT} that will, in this case, pass TANK1 to the graphic template and then I can build the rest using another cOBJECT variable since I know what that item is easily (remember, reusing of this screen means we don't know if this is TANK1 or TANK9. For graphic display purposes, everything shows up great because the $OBJECT string has the {..\$OBJECT} value replaced by the actual object instance name. Now the problem, once again, is that in scripting, when I get the $OBJECT of the composite member, I am now getting {..\$OBJECT} instead of the replaced value.
I have been looking at scripting to solve this problem, but the documentation is very weak, and figuring out how to reference the composite member graphic and assign the $OBJECT variable on a SCREEN OPEN event is also not going well. Seems like every point I turn, I run into some sort of problem. So here I am, hoping I'm not the only person that has run into this sort of issue before.
So, Im curious, has anyone actually leveraged using embedded classes as points and also with graphics successfully, and how have you done it? Am I just doing something wrong here, or is there a bug or setting in Cimplicity 2022 that I am not finding?
This is my first time posting, though I have been to this site a few times hunting for some random problem like we all do. I have run into an issue myself. I am starting out now using Cimplicity 2022 and attempting to leverage Classes/Objects along with the Graphic Templates that go along with it. I apologize for the lengthy thread, but the details are what is keeping me from being successful.
The issue I am running into is a scenario that I'm fighting to overcome. We have defined several Classes, some of which leverage embedded (Composite Members) classes within another. Several things I ran into that have been difficult to overcome, and now I'm looking for a good workaround, but each step of the way, I am finding what I think are bugs in Cimplicity, or I don't quite understand how to leverage the tool. I have read the documentation, but as normal, the help files and examples don't go quite far enough to do what should be possible.
First issue I ran into was related to the CIMPLICITY reserved variables. We are using an OPC-UA server and attempting to build the address by assigning parameters to do so. Part of doing this is to leverage the Object instance to make this work. There are 3 variables we are looking at: $ADDRESS, $OBJECT, and $ID. I will be using the following information in my examples to best explain what I am seeing:
- VALVE Class - this has all the typical parameters, but also has Data Items STS_OPEN, STS_CLOSED, CMD_OPEN, CMD_CLOSED
- TANK Class - this has all the typical parameters, has it's own Data Items LEVEL and HI_ALARM, but also has composite members INLET and OUTLET that are of type VALVE.
- [PATH].TANK1.LEVEL
- [PATH].TANK1.HI_ALARM
- [PATH].TANK1.INLET.STS_OPEN
- [PATH].TANK1.INLET.STS_CLOSED
- [PATH].TANK1.INLET.CMD_OPEN
- [PATH].TANK1.INLET.CMD_CLOSED
- [PATH].TANK1.OUTLET.STS_OPEN
- [PATH].TANK1.OUTLET.STS_CLOSED
- [PATH].TANK1.OUTLET.CMD_OPEN
- [PATH].TANK1.OUTLET.CMD_CLOSED
- $ADDRESS: This does not seem to be configured automatically at any point by CIMPLICITY that I can find or have tested. I'm not sure why it's reserved, but leveraging it doesn't seem to be useful accept if we want to define it as a parameter to fill in.
- $OBJECT: This works great most of the time. When we have an Object created of a class instance, this is the Object name. Using the example and looking at "[PATH].TANK1.LEVEL", we find that $OBJECT would be TANK1. This works great to build the path accordingly for the OPC UA Address. For scripting, this is also great. Now, this is where it gets weird. When we look at "[PATH].TANK1.INLET.STS_OPEN", we find that $OBJECT is now TANK1.INLET. Now, this seems to make sense, except when you look at what $ID does as well.
- $ID: This also works great most of the time. Using the same examples from before "[PATH].TANK1.LEVEL", we find that $ID is LEVEL just as you would expect. Now moving down into a composite member, this changes. Looking at "[PATH].TANK1.INLET.STS_OPEN", we find that $ID is now INLET.STS_OPEN.
As you can see, $OBJECT and $ID have duplicate items, so if using {$OBJECT}.{$ID} to build an address, we have an issue when using composite members. To solve this issue, we can take advantage of the $ADDRESS variable and in the parameter definition of the object, we can assign the {$OBJECT} or {..\$OBJECT} to the $ADDRESS variable and instead of using {$OBJECT}.{$ID} to build the OPC address, we can simply use {$ADDRESS}.[Composite Member Data Item Name]. Ok, so for the point itself, this works great and the point has the correct OPC path. Now, onto the graphics.
On the graphics front, we also build up Class templates to use. In our example, we could leverage the VALVE independently, and when done, we have no issue with the display. Keep in mind, building graphic templates requires you define $OBJECT and set it public. This is so we get the Object Instance name as the $OBJECT variable to use in our design. Again, as a standalone instance, this works great. Now, when we go to embedded one graphic template into another (we are using a linked copy) as in the TANK1 case, the TANK1 items work great, but the composite members do not. One would think the $OBJECT variable would take on the parent $OBJECT and be passed down, or built up to also include the compositive member name as it does in the above example, but here, we find that not to be the case. Instead, $OBJECT is just blank (or not defined, not sure which). You can note this by looking at Expressions and Point Control Panel to see the path is not fully formed. Ok, so simple enough, I can set the $OBJECT parameter by passing {..\$OBJECT} that will, in this case, pass TANK1 to the graphic template and then I can build the rest using another cOBJECT variable since I know what that item is easily (remember, reusing of this screen means we don't know if this is TANK1 or TANK9. For graphic display purposes, everything shows up great because the $OBJECT string has the {..\$OBJECT} value replaced by the actual object instance name. Now the problem, once again, is that in scripting, when I get the $OBJECT of the composite member, I am now getting {..\$OBJECT} instead of the replaced value.
I have been looking at scripting to solve this problem, but the documentation is very weak, and figuring out how to reference the composite member graphic and assign the $OBJECT variable on a SCREEN OPEN event is also not going well. Seems like every point I turn, I run into some sort of problem. So here I am, hoping I'm not the only person that has run into this sort of issue before.
So, Im curious, has anyone actually leveraged using embedded classes as points and also with graphics successfully, and how have you done it? Am I just doing something wrong here, or is there a bug or setting in Cimplicity 2022 that I am not finding?