Thru-Door Disconnects Tool

Phil Buchanan

Lifetime Supporting Member
Join Date
Jun 2015
Location
Atlanta, Georgia
Posts
640
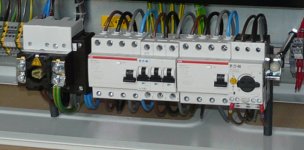
I really don't like thru-door disconnects at all and almost always use a flange type unless there are no other options but today we had to build a panel with a thru-door disconnect and I used one of the tools in the video below and it makes all the difference.

I have used almost every other method there is to do these but this makes it a snap and it's made by Schneider but you can use it on any disconnect.

https://www.youtube.com/watch?v=gCx1Yr8A1gc
 
The only thing I don't understand is, how the **** has nobody thought of this before? šŸ™ƒ genius!
 
Wow.

I have a few laser devices around that came from miter saws for lining up cuts. I never thought about using them like this.

I'll have to see what they cost.
 
I simply cut the rod to the correct length, insert it into the disconnect hole, color the tip with a grease pen and lightly hit the rod with the door. The mark in the door is the center. Apply template and drill. Takes me 5-10 mins to install with this method. We also have another rod where we sharpened the tip to mark the center.
 
For me the problem with through the door disconnects wasn't getting the holes drilled right. It was the eventual droop in the rod that made it hard to get the rod into the hole in the operator when closing the door.
 
I agree with Tom on that. You typically have to fudge the hole pattern down by about 1/8" to 3/16" to get everything to work in the real world.
 
It looks to me like the collar used as the securing nut is tapered to align the connecting rod even if it's got a "droop".
 
It looks to me like the collar used as the securing nut is tapered to align the connecting rod even if it's got a "droop".
Yeah, but the older it gets, the more it droops, until eventually it no longer goes in the hole...

:whistle:

Old school low tech version, drafting T-Square. Install the shaft, run the T-square along the top, mark the shaft position, do the same for the side, close the door, transfer the marks.
 
Last edited:
To compensate for the inevitable droop, since the hole in the door can't be moved, why don't disconnect manufacturers make the body of the disconnect with a height adjustment? As the years go by simply move the body up as needed.
 
Droop proof your door interlocked isolator!
I got frustrated with the droop and so mount isolators on DIN rail, on 8mm screwed rod. If there are other bits with the isolators the droop can still bend the 8mm rod, so I add stabilisers. In case they bend the box when they mount it, there is room for adjustment in three dimensions.

Isolator.jpg
 

Similar Topics

Hello all, (spawned by the pictures of panels thread =) We've been running into some issues at my plant with some old (20+ years) thru-door...
Replies
21
Views
8,227
So I'm having issues with a certain rung and one of my coworkers mentioned it may not allow the signal past the latch coil. For example in the...
Replies
27
Views
3,748
We have two, nearly identical machines. One configuration utilizes a L33ERM and I am able to see and access the local subnet devices, such as...
Replies
8
Views
996
I have a "complicated" situation but this is the short version. Our customer, another vendor (not the plant directly), has a isolated network at...
Replies
11
Views
2,994
Hi guys, I'm moving on in my training and my next goal is to learn how to make my hmi and plc communicate. I have an idea of how it should be set...
Replies
3
Views
1,755
Back
Top Bottom