1769-L33ER connection issue.

i followed the firmware flash instructions and it seemed to have gone through as the Led went from flashing Red to Green. but i didnt get the update completed message at the end, instead the 100 seconds timed out.

Now i get the Red X on the processor in RSLinx. so i am back to where i started (not being able to go online with processor)
i tried BOOTP and setting the IP address but nothing (i see the MAC address and IP address next to it) i am still unable to disable the BOOTP/DHCP.
i have restarted the PLC couple of times.
 
DO NOT Use ethernet to load your firmware. Use USB. There is a known issue with CompactLogix where you may brick your processor if you load firmware using ethernet. You have to load firmware out of the box before you can download any program to this CPU.

If you are using USB you might as well set the IP address after you have loaded the firmware.

I have never, ever flashed firmware over anything but ethernet. Total failures: zero. I do make sure to disconnect everything else from the network and just plug directly from PC to device, but that's just a good idea regardless.
 
i followed the firmware flash instructions and it seemed to have gone through as the Led went from flashing Red to Green. but i didnt get the update completed message at the end, instead the 100 seconds timed out.

Now i get the Red X on the processor in RSLinx. so i am back to where i started (not being able to go online with processor)
i tried BOOTP and setting the IP address but nothing (i see the MAC address and IP address next to it) i am still unable to disable the BOOTP/DHCP.
i have restarted the PLC couple of times.

The following works pretty much 100% of the time for me:
1. Plug directly from your laptop's ethernet port to the PLC
2. Disable any other network adaptors (wi-fi, any USB-ethernet adaptors, etc)
3. Make sure that your PC has a static address on the same subnet as your PLC (i.e. if the IP address of the PLC is 192.168.1.2, make sure your laptop is set to 192.168.1.[any number from 0-255 except 2]), and the subnet mask is 255.255.255.0
4. Delete any gateway or DNS settings from the IP address setup
5. Disable BootP/DHCP
6. ????
7. Profit!


Edit: just read your previous post a little more carefully...
so i had to disabled my wifi and under TCP/IP(4) i had to set obtain IP automatically
...which, if you haven't changed it since, will probably mean that the step above that you're missing is Step 3. Run through all the steps to be sure, but I'd say that's the one you'll find is missing :)
 
Last edited:
Alright! somehow i got it working. i was able to go online and download the program. I am not happy that i couldnt figure out what was wrong but glad it worked :)

i did restart my computer and the PLC.
 
Ethernet Firmware Flash - You must Disable BOOTP/DHCP!

samvivi7 said:
so i had to disabled my wifi and under TCP/IP(4) i had to set obtain IP automatically

then the correct MAC address of the processor showed up
i was able to set the IP address to the processor but wasnt able to disable the DCHP/BOOTP
i closed the BOOTP/DHCP program.
Restarted the PLC and set IP address, sub and gateway.
i no longer have a big red X on the PLC in RSLinx (i am assuming i good with communication).
But now its asking to update the firmware in Studio5000 when i try to go online

i will try to update the firmware and get back...

...i followed the firmware flash instructions and it seemed to have gone through as the Led went from flashing Red to Green. but i didnt get the update completed message at the end, instead the 100 seconds timed out.

Now i get the Red X on the processor in RSLinx. so i am back to where i started (not being able to go online with processor)
i tried BOOTP and setting the IP address but nothing (i see the MAC address and IP address next to it) i am still unable to disable the BOOTP/DHCP.
i have restarted the PLC couple of times.

I'm glad you got sorted but I'll post this anyway for your future sake and others...

When you initially used BOOTP Server to assign the IP address it would NOT disable BOOTP/DHCP.

You then carried on and closed BOOTP Server.

You then restarted the PLC and set its IP address again.

You could then see it OK in RSLinx Classic under your Ethernet driver and all looked OK.

But, BOOTP/DHCP was still NOT disabled.

You then tried to go online and were informed that you needed to flash the firmware.

You proceeded to do so through your assumed OK Ethernet connection.

Once the firmware flash got to "Polling for powerup" the processor rebooted and the IP address was lost because DHCP was still enabled.

The connection path for the firmware flash to finish was now lost.

When flashing these processors using Ethernet, you MUST ensure that BOOTP/DHCP is disabled for the embedded Ethernet port, else the "Polling for power timeout" will occur.

BOOTP Server not disabling BOOTP/DHCP for devices is a common enough occurrence for users. I would advise you to connect to the processor using a USB cable and when you can see the processor under the USB CIP Driver in RSLinx Classic, right-click the processor and choose...

Module Configuration>Port Configuration>Static

This will assign a Static IP address to the processor i.e. disable BOOTP/DHCP.

Power cycle the controller and check the IP address has been retained by browsing for it using your Ethernet driver in RSLinx Classic. You could also check the Module Configuration again to be double sure.

Once you know the embedded Ethernet port has been assigned a Static IP address you can proceed to flash the firmware using Ethernet or alternatively you could use USB to flash it.

Flashing firmware using Ethernet is faster but comes with the above necessary steps to ensure a good flash.

Flashing firmware using USB is slower but does not require such steps.

Note: Even if flashing using USB, one can connect using USB and assign an initial Static Ethernet IP address and then proceed to flash the controller using USB. The Static IP address will be retained through the flash or any subsequent power cycles. This is because the embedded Ethernet port settings are saved in separate memory pertaining to the port and not in non-volatile memory.

The same can be said for the older CompactLogix Ethernet controllers such as the 1769-L32E and -L35E for retaining their IP address. Even if you power down and disconnect the battery, the controller will power up with the same IP address as before.

So, going forward, the best advice I can give here for Ethernet flashing is to use USB to set the initial Static IP address through RSLinx Classic and power cycle, checking its retained. Then proceed to flash the firmware through the Ethernet port.

All the other good advice above included, of course.

Regards,
George
 
Alright i decided to connect to the PLC using the USB cable and make the suggested changes. Module Config > Port config> static.

Now i am getting a I/O not responding fault. the I/O LED is flashing.

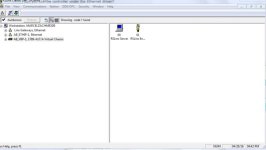
when i connected the USB to the PLC i got a Virtual PLC listed above the USB in RSLinx.

i think it has to do with the I/O not responding as its causing a duplicate IP or something. (just my assumption).

can someone help me out :(

Thanks
 
Close RSLinx Classic before you plug in the USB cable. Then open it after Windows has had time to shake hands with it.

Can you see the controller under the USB driver?

Is the Ethernet cable also connected between you and the controller?

Can you see the controller under the Ethernet driver?

What IP address are you using for your computer?

What IP address are you using for your controller?

An I/O LED flashing should have nothing to do with good communications between a controller and a computer.

The OK LED is steady ON, yes?

Regards,
George
 
i had RSLinx closed before i connected the USB cable.
i am able to see the controller under the USB driver
i didnt have the Ethernet cable connected.
i am using IP address 192.168.1.1 for the computer
and IP 192.168.1.10 for the controller
the OK LED is steady ON
 
samvivi7 said:
...i didnt have the Ethernet cable connected...

If you DO have the Ethernet cable connected...

Can you see the controller under the Ethernet driver?

Have you any expansion I/O modules physically added to the controller.

Have you any I/O modules added under the I/O Configuration in the project you downloaded to the controller?

Regards,
George
 
Hey Geospark

are you asking me to connect the Ethernet and USB at the same time to see if i get connected with both ???

i have 8 I/O modules connected with the end cap

and yes i do have the I/O added under the project.

i will be troubleshooting it with my boss :| (not looking forward to that) will let you know.
 
samvivi7 said:
...why do i have this Virtual Chassis ??...

Don't worry too much about the Virtual BackPlane (VBP) driver. It's normal for this driver to be automatically added when you plug in to a USB port on a Logix controller. It provides a means of accessing modules on the backplane and browsing to networked devices. An example would be browsing out through ControlLogix 1756-ENxTx communications modules.

For what you're about here I would only concern myself with the CIP USB driver and Ethernet driver in RSLinx Classic.

samvivi7 said:
...are you asking me to connect the Ethernet and USB at the same time to see if i get connected with both ???...

You can have the USB and the Ethernet cables plugged in simultaneously and you should then be able to browse to the controller via either the USB or Ethernet driver.

The reason I'm asking about the Ethernet driver is that you've said that the last thing you did was plug in using USB to set a Static IP address. I mentioned that you should always cycle power and check the Static IP address has been retained. You can do this by connecting to the controller via Ethernet and then verify you can see it under the Ethernet driver at the correct IP address.

You say you had not got the Ethernet cable connected after carrying out the USB Static IP address procedure. So this would lead me to believe that you have not carried out this important verification.

While doing this is important, I am only pointing this out so you are proceeding correctly and systematically. Verification of the Static IP address should have nothing to do with your I/O fault.

Why your controller's I/O LED started flashing, after you used USB to assign a Static IP address, I am not quite sure yet?

I would go online, using either driver, and try to establish what specific I/O fault has occurred. A typical I/O fault on new installations is "Major Fault Type 03 Code 23" where at least one connection failed to be established before going to RUN Mode. A common reason for this can be an invalid rack configuration.

While I'm only giving one example there, it would not hurt to ask at this stage what is the physical arrangement of the processor, I/O modules and the 1769 power supply? Make sure there are only 3 I/O modules between the processor and power supply.

Regards,
George
 
Hey Geospark

So it turns out i made a stupid mistake when adding the I/O modules in Studio i accounted for the power supply as a slot (1 2 3 PWR 5 6 7) which throw-off the PLC.

Everything seem to work fine now.

i would like to thank everyone for all the help :) :) :)
 

Similar Topics

Hey guys, On my system, i got prop valve controling cylinder on the left and right to adjust the center of a lumber before it get in a woodmill...
Replies
8
Views
931
We have a machine that has a 1769-L33ER and we were wanting to connect it to our plant network. Currently has a local network for drives and HMI...
Replies
1
Views
853
So, here's the situation the best I can explain it. I have a 1769-L33Er that uses a set of recipes selected by the customer via FT SE on a...
Replies
4
Views
1,650
I'm trying to get an upload from a machine for backup purposes. The upload seems to work fine but at the end I get errors and no upload. It...
Replies
2
Views
1,394
Hello, I have a machine I am programming and it seems I am unable to create a string tag for some odd reason in the pv800. CCW v 20 and pv800 fw...
Replies
3
Views
1,709
Back
Top Bottom